Whether you’re hosting a special event at home or you’re simply looking for something to give the room a bit of a lift, a flower arrangement is just the thing to brighten your dining table.
Creating your very own floral arrangement is also incredibly rewarding; when the table is set and ready, you’ll be feeling all the more proud knowing you put the arrangement together yourself!
If you’re new to floral arranging, we’ve got you covered. Here, we share a step-by-step guide for how to make a table flower arrangement. We’ll also take a look at how to style your table setting.
Let’s jump right in!
Table Setting: Creating Your Own Flower Arrangements
While making your own centrepiece might sound intimidating, you don’t need to be well-versed in blooms to create a stunning arrangement.
It's really all about experimenting with different flowers and drawing from your own personal style to create something unique and striking.
Creating your very first arrangement takes a little planning and preparation, so give yourself enough time to gather everything you need and really have fun with the process.
For the more confident arrangers among us, you can try heading to your local market to pick up some flowers.
Alternatively, you can pick out your blooms and place an order with Floraly online. You’ll receive your blooms within 48 hours, ready to be arranged!
We’re all about the journey from bud to bloom, so we’ll send you flowers while they’re still in bud to ensure they bloom in your home and last as long as possible.
They’ll arrive with flower food too, so you won’t need to worry about sourcing your own.

How to Decorate a Table with Flowers
Firstly, let’s take a look at how to prepare your table for your flower arrangement.
It’s a good idea to come up with a theme, colour scheme, and to lay out your dinnerware so you know exactly what you’re working with.
This will help to guide your choice of blooms, as you’ll have a better idea of which colours and shapes will work among the rest of your table setting.
Step 1: Choose a Colour Palette
Begin by selecting a theme and colour palette for your table.
If you’re not sure where to begin, we recommend starting with a neutral base, such as a white or sandy-coloured table runner.
From here, you can build up the colour (or, for the minimalists among us, continue with earthy tones).
If you already have your dinnerware sorted, be guided by these tones.
When working with gold, silver, or shades of white, you can play with all sorts of colours and tones.
For dinnerware with particular prints or coloured detailing, use those hues as a springboard for the rest of your decor.
Let’s take a look at some ideas.
In the warmer months, perhaps you’ll go for a European summer-themed table, complete with a white linen tablecloth, gold and white dinnerware, jars of lemons and oranges, and colourful decor.
As for the perfect wintertime table, we love moody tones such as autumnal oranges and browns or rich red and plums paired with silver dinnerware.
Perhaps you’re arranging a Mother’s Day or birthday brunch, and you’re working with pastel floral dinnerware. A sage green colour palette would complement floral dinnerware perfectly.
Once you’ve worked out your colour palette and have your cutlery and dinnerware set, it’s time to get creative!
Step 2: Add Your Decor
Add some personality to your table by adding some decor.
In addition to your bowls, plates, and cutlery, pop in a few candles, ornaments, antique pieces, and vases.
Go for pieces of varying heights and shapes to add level and dimension to your table. However, be sure to work with the colour theme to prevent things from clashing or looking overly busy.
Worried about shuffling around decor to fit food platters in? Arrange some decor on a chic tray that you can swiftly move away when the food is ready.
Step 3: Floral Details
Consider adding a single flower stem next to each place setting. You can use ones from your garden that complement the main arrangement, or use leftovers from the arrangement itself.
Not only is this a lovely gift for your guests that they can take home with them, but it also ties the whole table together.
Step 4: Position Your Flowers
Lastly, it’s time to position your flower arrangement! We’ll unpack how to create your arrangement below.
Place your vase at the centre of the table and tweak your table setup as needed.

How to Make a Table Flower Arrangement
Now that your table is ready to go, let’s take a look at how to put together the perfect flower arrangement.
Step 1: Decide on Your Design and Collate Your Tools
The most effective way to start your arrangement is to be guided by your colour palette.
You know which dinnerware and decor you’ll be using, so look for blooms that complement these elements.
A monochromatic palette works beautifully. A monochromatic arrangement will showcase blooms in varying shades of the same hue as your table setting.
Alternatively, you could opt for a floral design with contrasting colours for a funky, creative edge. For example, an all-white or neutral-toned table setting can be brightened up with a vase full of colourful, bouncy poppies.
The most important thing is that you make the arrangement yours!
To create your arrangement, you will need the following:
- Flower clippers or sharp scissors
- A vase or jug
- Water
- Blooms
- Floral tape
- Flower food
- Optional: Wild greens (such as bay leaves or umbrella ferns)
Step 2: Cut Your Stems
We know you’ll be tempted to dive right into putting your arrangement together, but it’s important to take the time to prepare your blooms properly.
This will help to ensure that they last as long as possible and will keep them looking fresh and tidy.
Firstly, remove any extra leaves or damaged petals from the stems. You can also cut off unwanted buds growing from the stems.
Then, make a fresh diagonal cut on the bottom of each stem, and place them in a bucket of water while you work.
Step 3: Choose a Vase
The shape of the vase will dictate the look of your arrangement, so choose wisely!
A wide, low spherical vase will create a wild, spilling-over-the-edges look, perfect for a relaxed arrangement.
Alternatively, a vase with a long neck will create a more structured, upward-focused arrangement.
When choosing your vase, consider the flowers you’re using. Tulips, for example, usually require the support of a straight-edge vase, while top-heavy flowers are suited to lower, weightier vases.
Step 4: Create a Base
Time to prepare your vase.
Add in some water and flower food to begin. Next, you’ll need to create a structure that will hold up your arrangement.
You can create this foundation with floral tape by creating a grid over the mouth of the vase. When you’re placing your greenery and blooms in, you’ll stick them in the grid holes. This will ensure they remain in place, supported, and balanced.
Step 5: Add in Greenery
This step is optional, but greenery is a great way to add depth and round out your arrangement. Greenery can also help to hold up your arrangement and keep everything locked in.
Pop the stems into the grid holes in a criss-crossed pattern. This creates a sturdy base for the arrangement to sit upon.
Use a range of greenery at different heights to create a more relaxed and wild look. Alternatively, keep the stems at the same length for a more manicured and uniform look.
Step 6: Add Your Textured Blooms
Next, you’ll add in your textured flowers.
The bigger, textured flowers are best placed in the middle ground of the arrangement. Think varieties such as veronicas, ranunculus, and fritillaria flowers.
Cut the stems at different lengths to add levels, then play around with their position in the arrangement.
Step 7: Add in Remaining Flowers
It’s time to pop in those statement flowers! These are the main characters in your arrangement — your roses, poppies, peonies, and tulips.
Begin low and close to the vase and work your way upward with the longer stems, in a kind of spiralled shape.
Step 8: Tweaking Your Arrangement
Now, we edit and review the arrangement. Take a step back and observe your arrangement from all angles.
You can balance and polish the centrepiece by adding greens, changing the position of different stems, and removing or adding blooms where necessary.
Don’t be disheartened if this takes some trial and error — that’s what it’s all about! Have some fun with it and get experimental with the arrangement.
Step 9: Admire Your Work
Once you’ve completed your arrangement, take a moment to admire your work.
Creating a beautiful, unique floral arrangement is a rewarding and fun experience, and we know your guests will love the result!
Place your vase at the centre of the table and you’re good to go.

Flower Table Setting Ideas
Floristry is a visual medium, so we’ve collated some inspiration pictures to get your mind ticking.
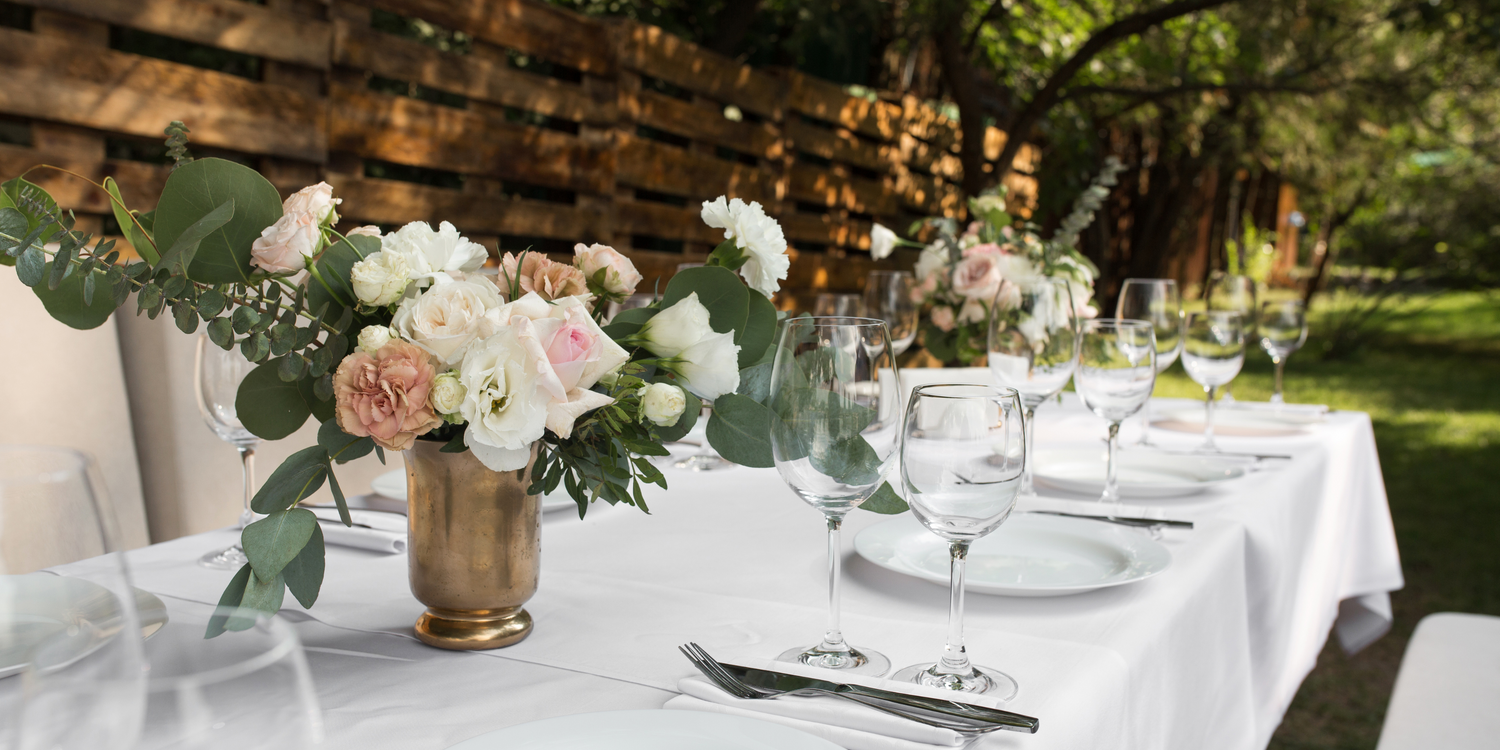
Fresh Flower Table Setting
There’s nothing quite like a fresh flower table setting to bring life and light into a space. Here are some of our favourite table settings featuring fresh flower arrangements.
Dried Flowers Table Setting
If fresh flowers aren’t your thing, or you’d like to try something different, why not try a dried flower arrangement?
Dried flowers have the added benefit of lasting longer, plus they deliver a chic, coastal look. You can pick out your perfect dried blooms from Floraly, or learn how to dry your own flowers!
Get Creative with Your Blooms
When it comes to making a table flower arrangement, the main thing to remember is to enjoy the process and put your own flair into your design.
Stick to a colour palette that complements your table setting, and don’t be afraid to experiment with different shapes and configurations. Go with the flow and create a floral table design you love!